Take Your First Booking
Quick path: + Booking → Select product → Select session → Add customer → Confirm
What this helps you do
Section titled “What this helps you do”The POS (Point of Sale) is where you create bookings for walk-in customers, phone reservations, or any sale you need to register on someone’s behalf. Instead of waiting for an online booking, you handle everything yourself: select what they want, when they want it, and who they are.
Before you start
Section titled “Before you start”- At least one product exists (Resources > Products)
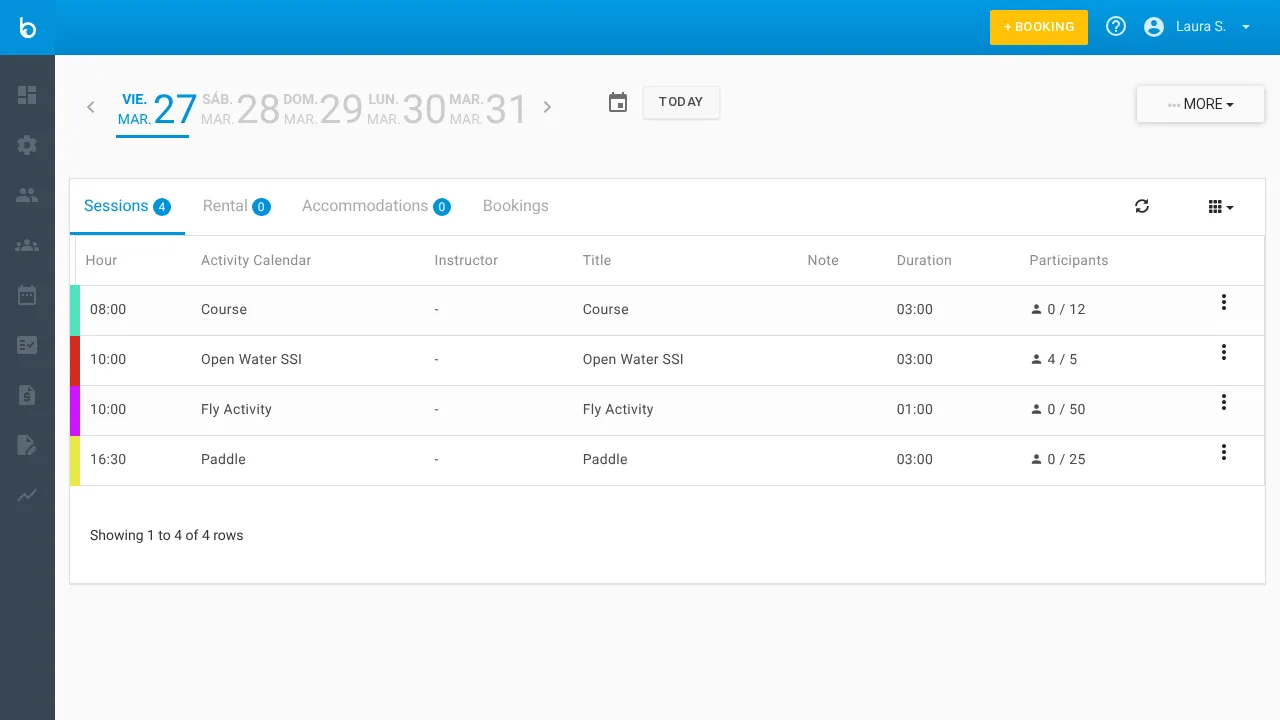
- The product’s activity calendar has sessions on the agenda (Planning > Agenda)
Don’t have these yet? Complete the Your First Setup Checklist first.
1. Click ”+ Booking”
Section titled “1. Click ”+ Booking””Click the + BOOKING button in the top-right corner of any page. This opens the POS booking screen.
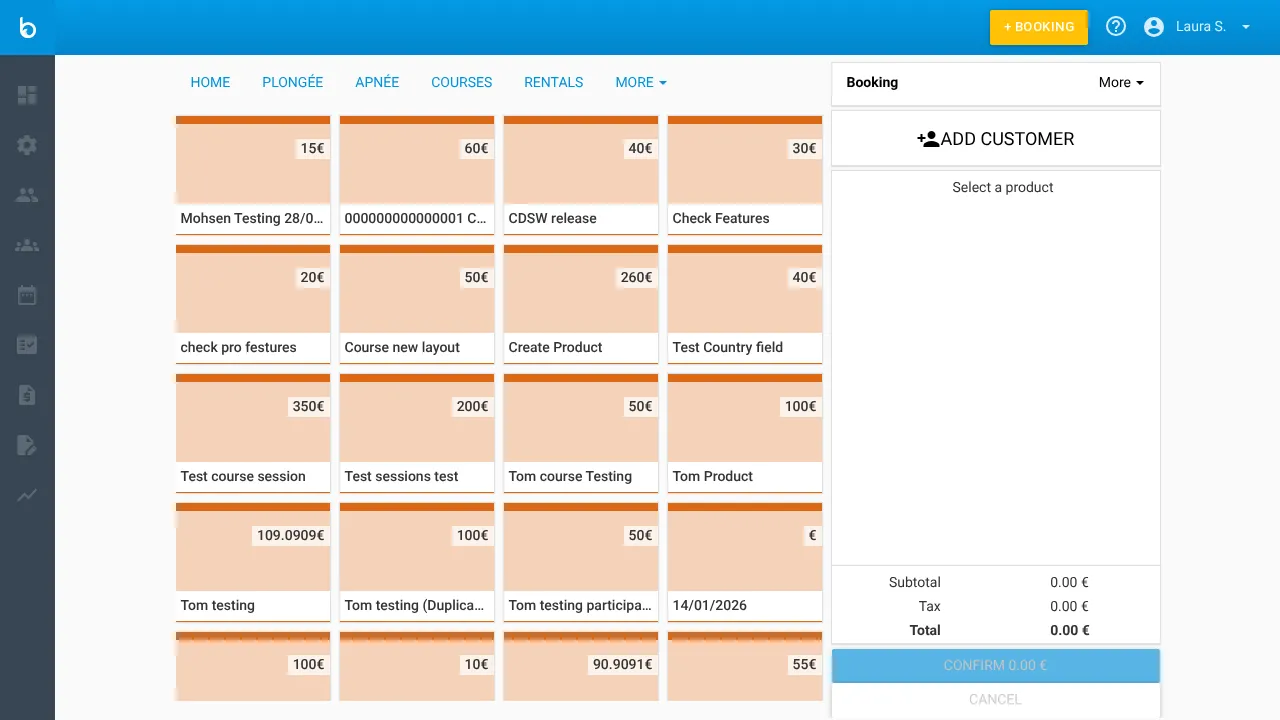
2. Select a product
Section titled “2. Select a product”The POS shows your product catalog on the left, organized into tabs by category (e.g. SURFING, DIVING, COURSES, RENTALS). The right panel shows the Booking summary with a running total.
Click a product card to select it. Each card shows the product name and price.
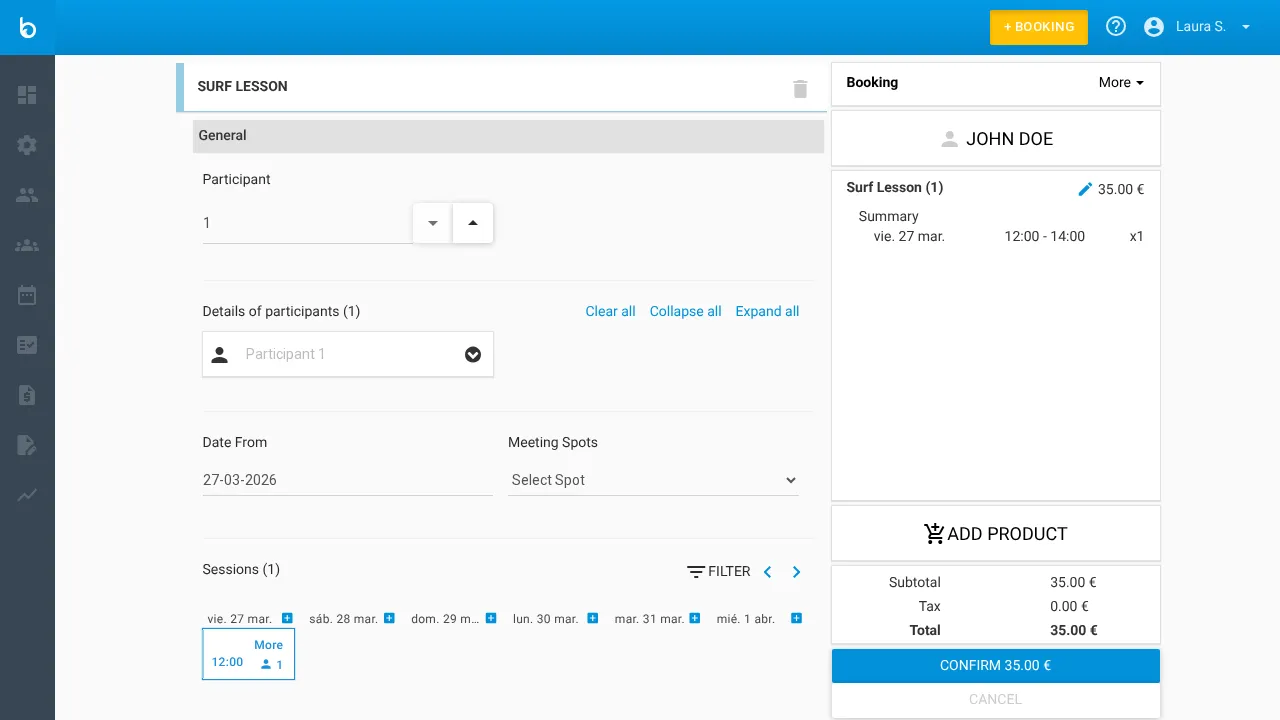
3. Select a session
Section titled “3. Select a session”After selecting a product, the booking form appears on the left with these fields:
| Field | Description |
|---|---|
| Persons | Number of participants (use the arrows to adjust) |
| Participant details | Name fields for each participant |
| Date From | Start date for session search (defaults to today) |
| Sessions | Weekly view showing available sessions with + buttons to create new ones |
If sessions already exist this week, they appear as clickable cards showing the time and participant count. Click a session card to select it.
If no sessions exist for the dates shown, click the + icon next to a day to create one on the fly. The ADD SESSION modal opens with default settings pre-filled.
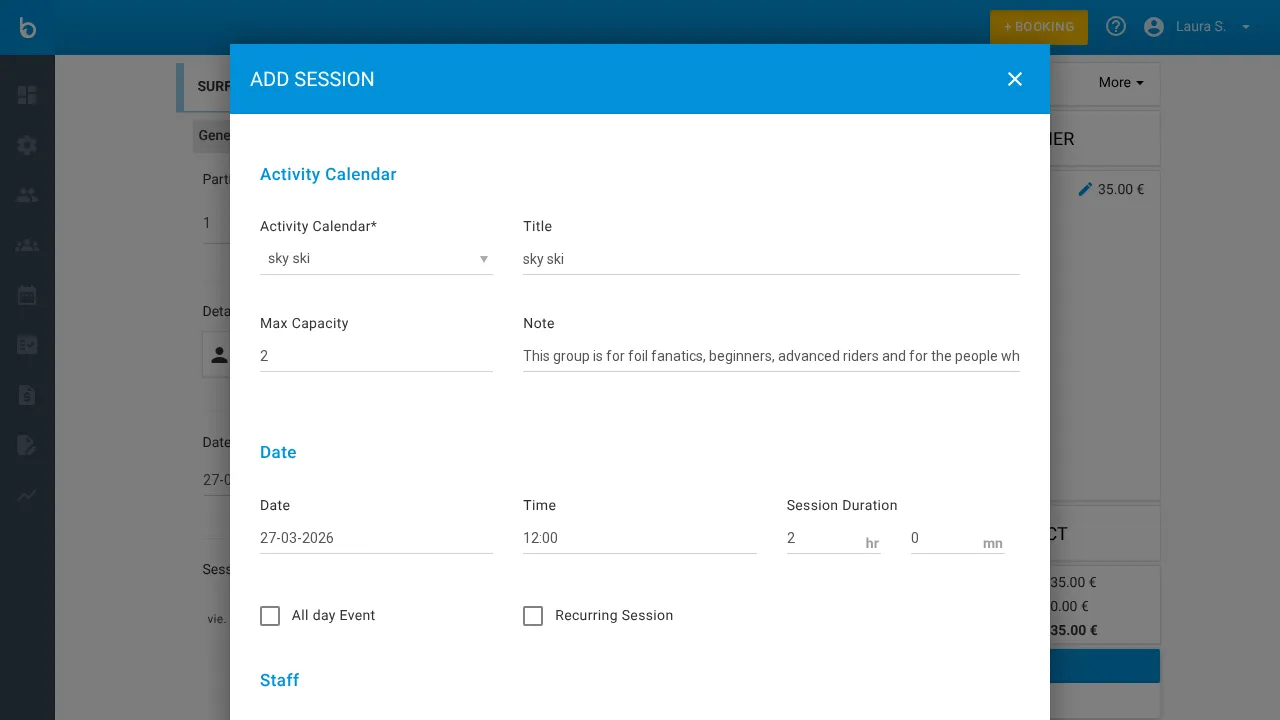
Click ADD AND SELECT SESSION to create the session and select it in one step.
The selected session appears highlighted under its day, and the right panel’s Summary updates with the session date and time.
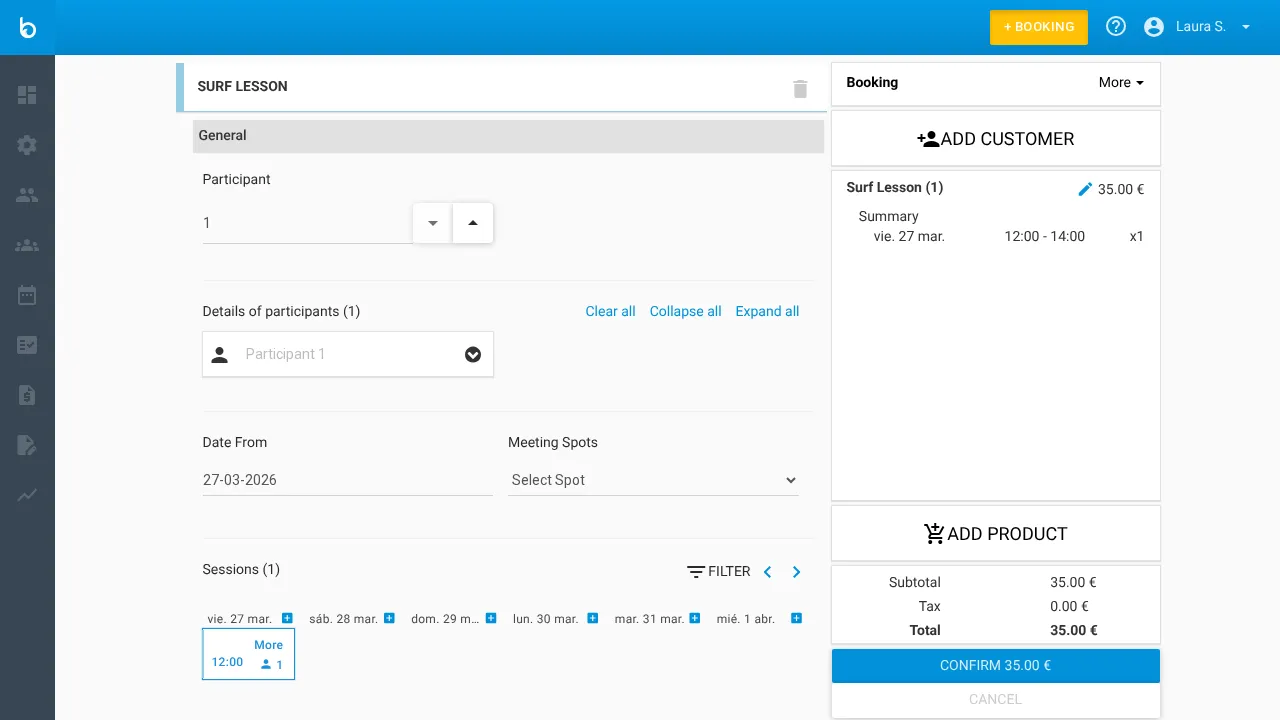
Tip: Use the FILTER button and the < / > arrows to navigate weeks if you don’t see the session you need.
4. Add a customer
Section titled “4. Add a customer”Click Add customer in the right panel (the person icon next to the customer name area). The Customer information modal opens.
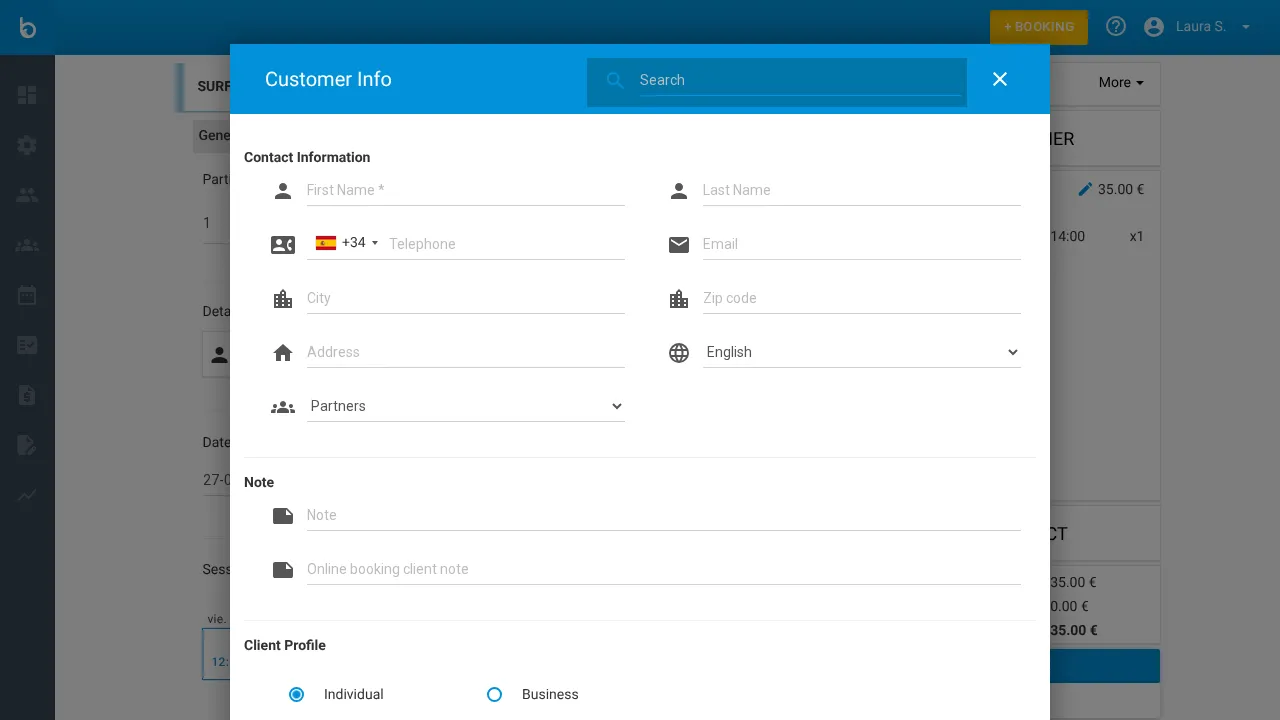
You can either:
- Search for an existing customer — Type a name in the Search field at the top
- Create a new customer inline — Fill in the form fields below
| Field | Example | Notes |
|---|---|---|
| First name * | “Sarah” | Required. |
| Last name | ”Johnson” | Optional. |
| Phone | ”+44 7700 000000” | Optional. With country code selector. |
| ”sarah@example.com” | Optional. For confirmations. | |
| City | ”London” | Optional. |
| Postal code | ”SW1A 1AA” | Optional. |
| Address | ”10 Downing Street” | Optional. |
| Language | Select from dropdown | Optional. |
| Arrival Date | DD/MM/YYYY | Optional. Customer’s arrival date. |
| Agents | Select from dropdown | Optional. Link to a reseller/agent. |
| Note | Free text | Optional. Internal notes. |
Scroll down and click Confirm to save the customer and attach them to the booking.
The customer’s name now appears in the right panel header.
5. Confirm the booking
Section titled “5. Confirm the booking”Click CONFIRM (showing the total amount) at the bottom of the right panel. A confirmation dialog appears with optional extras:
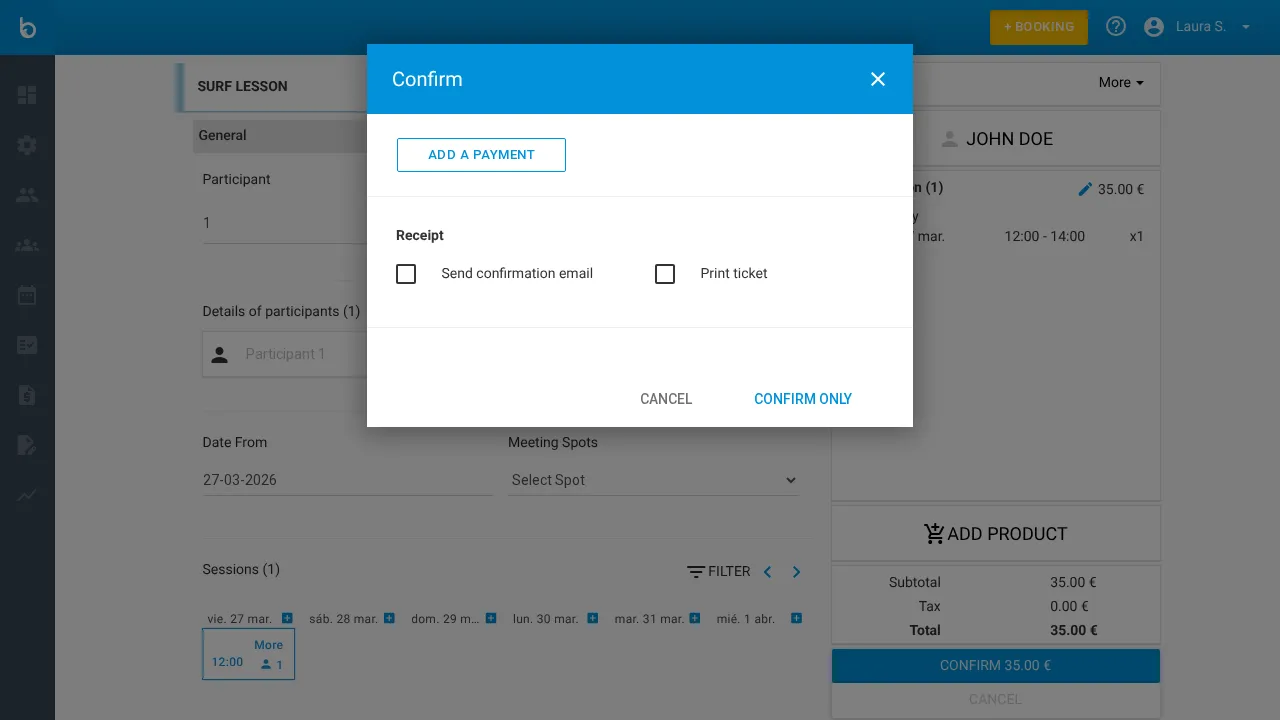
| Option | Description |
|---|---|
| ADD A PAYMENT | Register a payment before confirming (cash, card, etc.) |
| Send confirmation email | Check to email the customer a booking confirmation |
| Print the ticket | Check to print a receipt |
Click CONFIRM to finalize the booking.
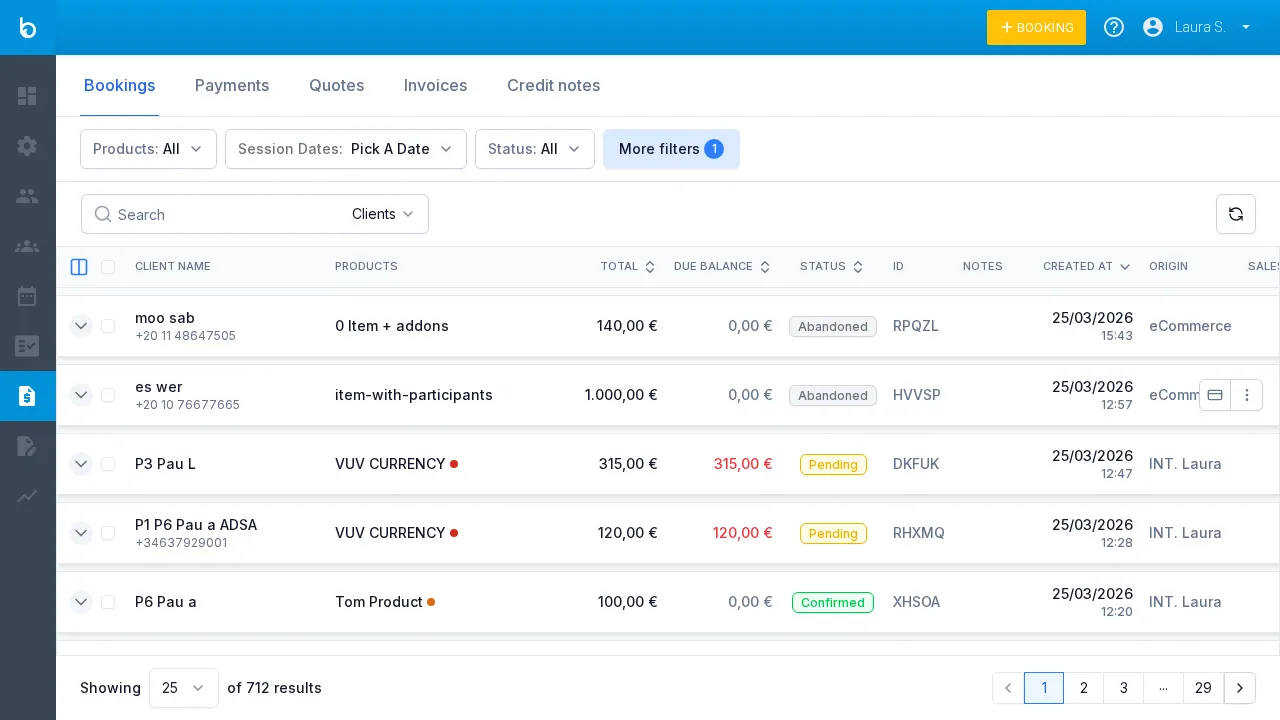
6. Booking appears in Sales > Bookings
Section titled “6. Booking appears in Sales > Bookings”After confirming, you land on the Sales > Bookings list. Your new booking appears at the top with status Pending (no payment added) or Confirmed (paid).
What should happen next
Section titled “What should happen next”- The booking shows in Sales > Bookings with the customer name, product, total, and status
- The participant is added to the session on the Agenda
- Click the More menu (⋮) on a booking row to open it, create an invoice, copy a payment link, or cancel
Common mistakes
Section titled “Common mistakes”| Mistake | Why it happens | Fix |
|---|---|---|
| ”No sessions appear for my product” | The activity calendar has no session slots this week | Navigate to a different week, or create a session on the fly |
| ”I can’t find the customer I just added” | You typed a partial name or the customer has a typo | Use the Search field and try the email or phone number |
| ”Booking shows as Pending, not Confirmed” | No payment was registered before confirming | Open the booking and add a payment, or it will auto-confirm when paid |
| ”Wrong product selected” | Clicked the wrong card in the catalog | Start over — click + BOOKING again and select the right one |
If it still doesn’t work
Section titled “If it still doesn’t work”- Verify that your product has an activity calendar with sessions on the agenda
- Check that the session has available capacity (not full)
- Make sure the product is active and not archived
- Contact Bloowatch Support via the chat widget
