Create a Course Product
Quick path: Resources → Products → + New product → Course → Fill details → Save
What this helps you do
Section titled “What this helps you do”A Course product represents a fixed series of sessions sold as a package. Unlike Flexible Sessions (one session per booking), a Course bundles multiple sessions together — customers pay once and are enrolled for the full program.
Use this when you offer:
- Multi-day certification programs (e.g., SSI Open Water — 5 sessions)
- Weekly training series (e.g., 4-week beginner surf program)
- Intensive camps with a fixed daily schedule
Before you start
Section titled “Before you start”- At least one Activity Calendar exists (Resources > Activities > Calendars)
- You know how many sessions the course includes
- You know the total price or per-session price for the course
- You know which tax rate applies
1. Go to Resources > Products
Section titled “1. Go to Resources > Products”Click Resources in the left sidebar, then click the Products tab.

2. Click ”+ Create new product”
Section titled “2. Click ”+ Create new product””Click the + Create new product button in the top-right corner.
3. Choose “Course”
Section titled “3. Choose “Course””Select Course from the product type selector. This is the right choice for any product that spans multiple sessions with a fixed schedule.
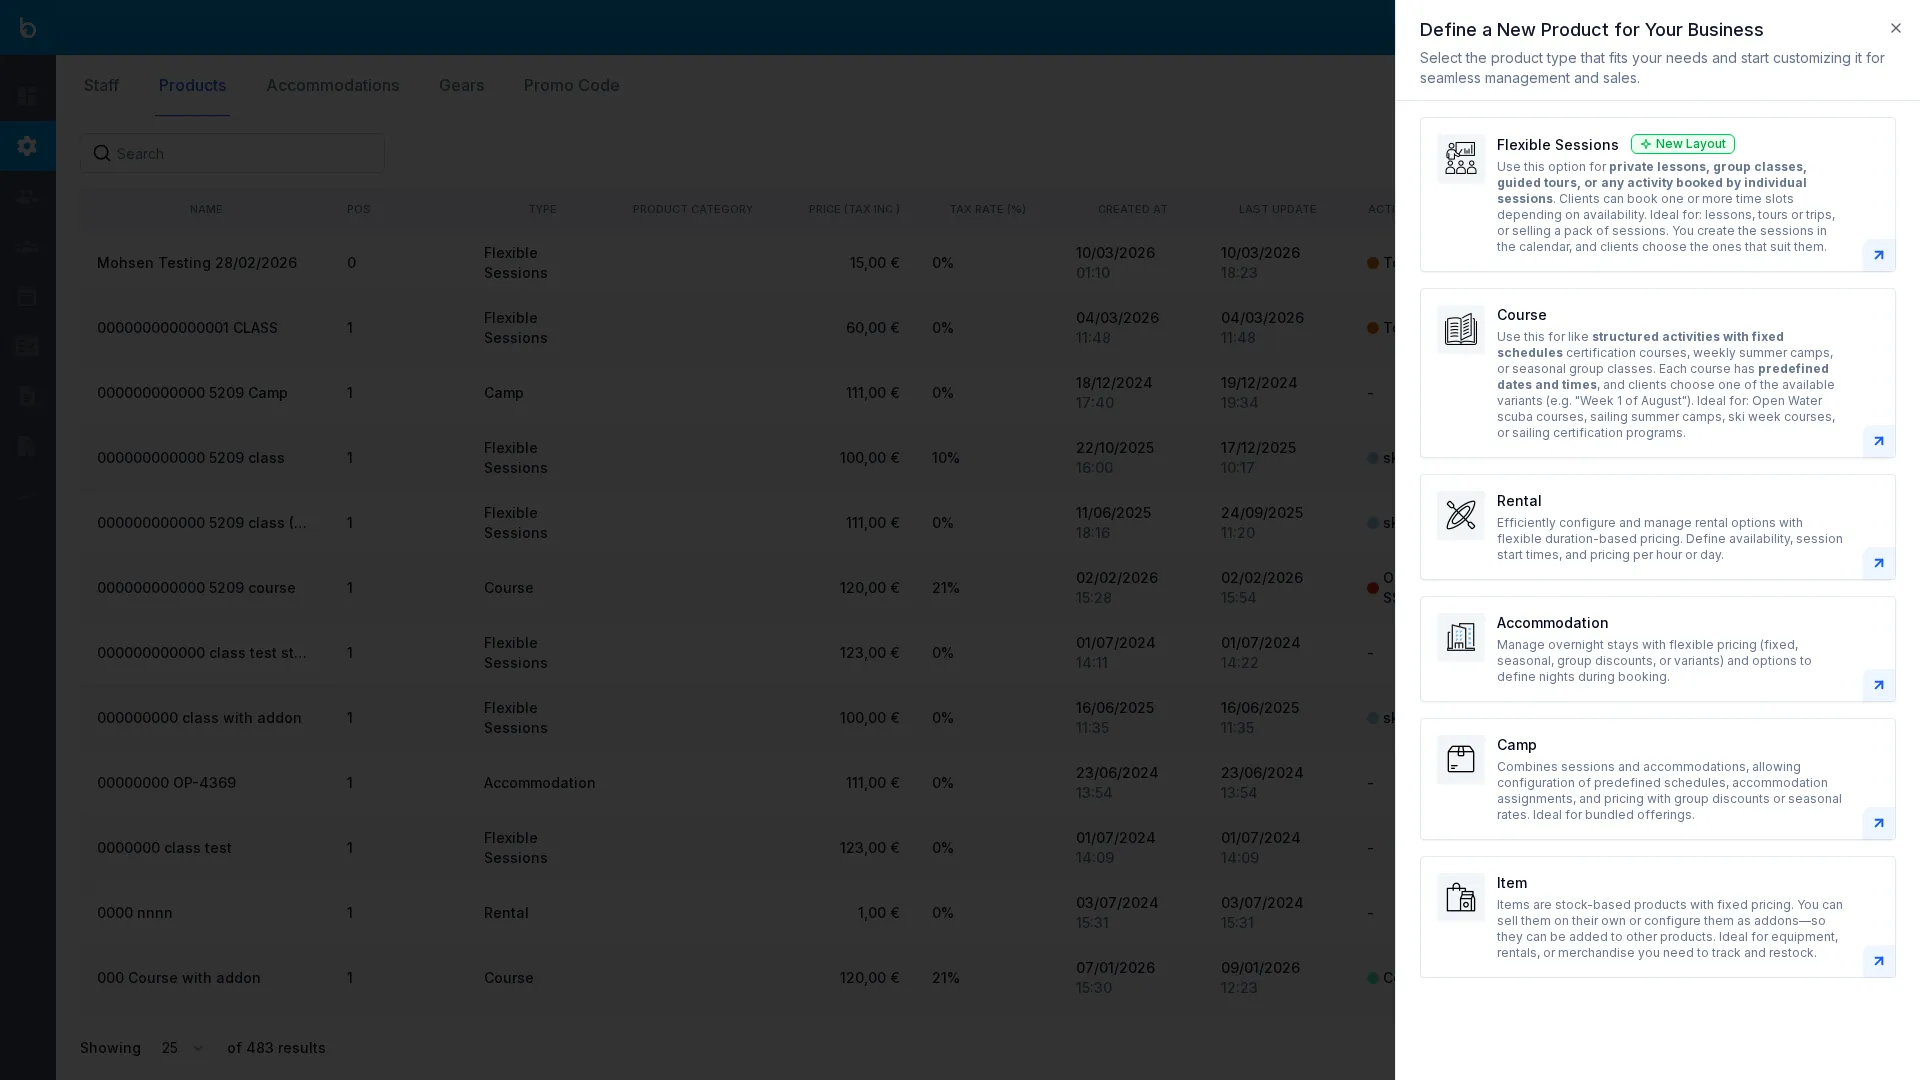
Course vs. Flexible Sessions? Use Course when customers pay for a bundle of sessions upfront (e.g., “5-Day Dive Course”). Use Flexible Sessions when each session is booked and paid individually (e.g., “2-Hour Surf Lesson”).
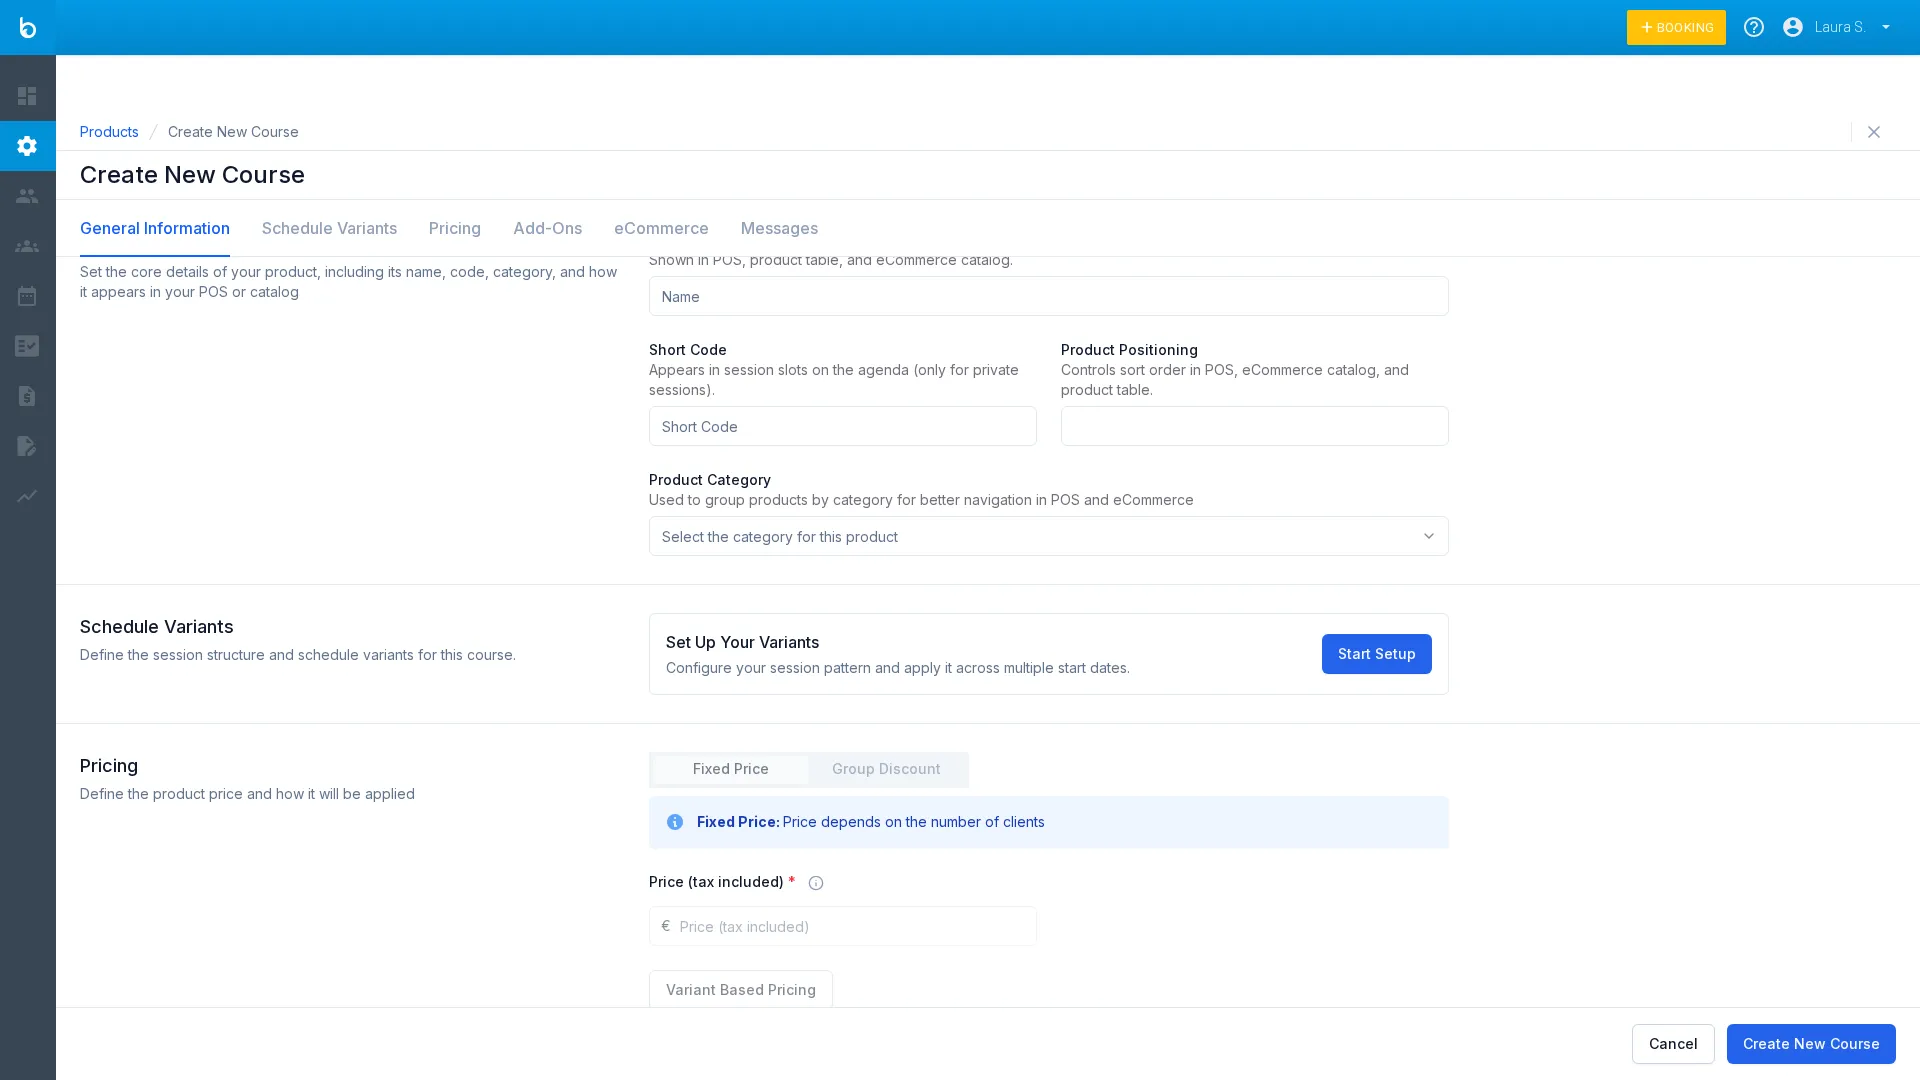
4. Fill in the General Information
Section titled “4. Fill in the General Information”Start with the General Information tab:
| Field | Value | Notes |
|---|---|---|
| Name * | e.g. “5-Day Surf Course” | Required. Shown in POS, product list, and eCommerce catalog. |
| Short code | e.g. “SURF5” | Optional. Appears on session slots in the Agenda. |
| Product positioning | e.g. 2 | Optional. Sort order in POS and catalog. |
| Product category | Select from dropdown | Optional. Groups products for navigation. |
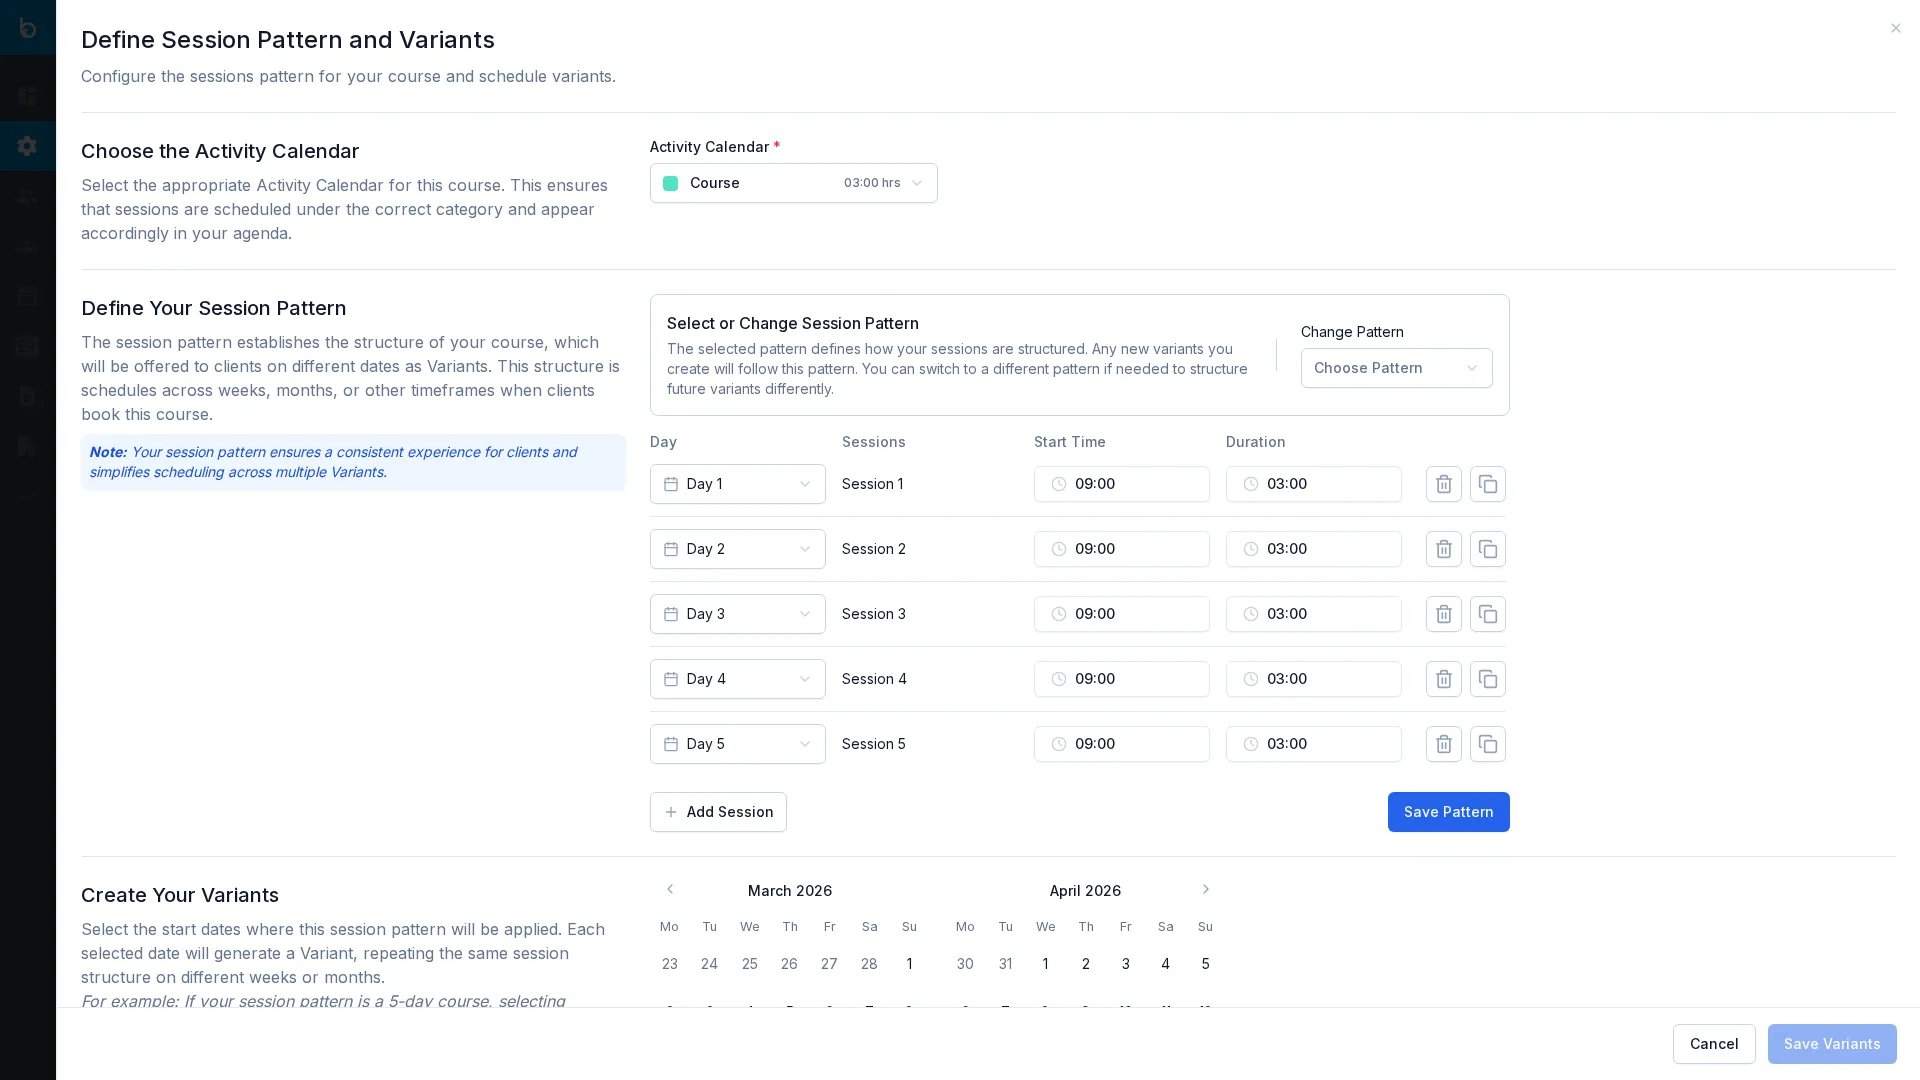
5. Configure scheduling
Section titled “5. Configure scheduling”Switch to the Scheduling Configuration tab. This is where the Course type differs from Flexible Sessions:
| Field | Value | Notes |
|---|---|---|
| Activity Calendar * | Select from dropdown | Required. Links the course to an activity calendar. |
| Number of sessions * | e.g. 5 | Required. This is the key difference — set how many sessions the course includes. |
| Private sessions | Checkbox | Optional. Enable for exclusive booking of the full session. |
| Availability periods | Checkbox | Optional. Restrict when this course can be booked. |
Watch out: The Number of sessions must match the actual sessions you’ll create on the agenda. If the course says “5 sessions” but you only schedule 3, customers will see mismatched availability.
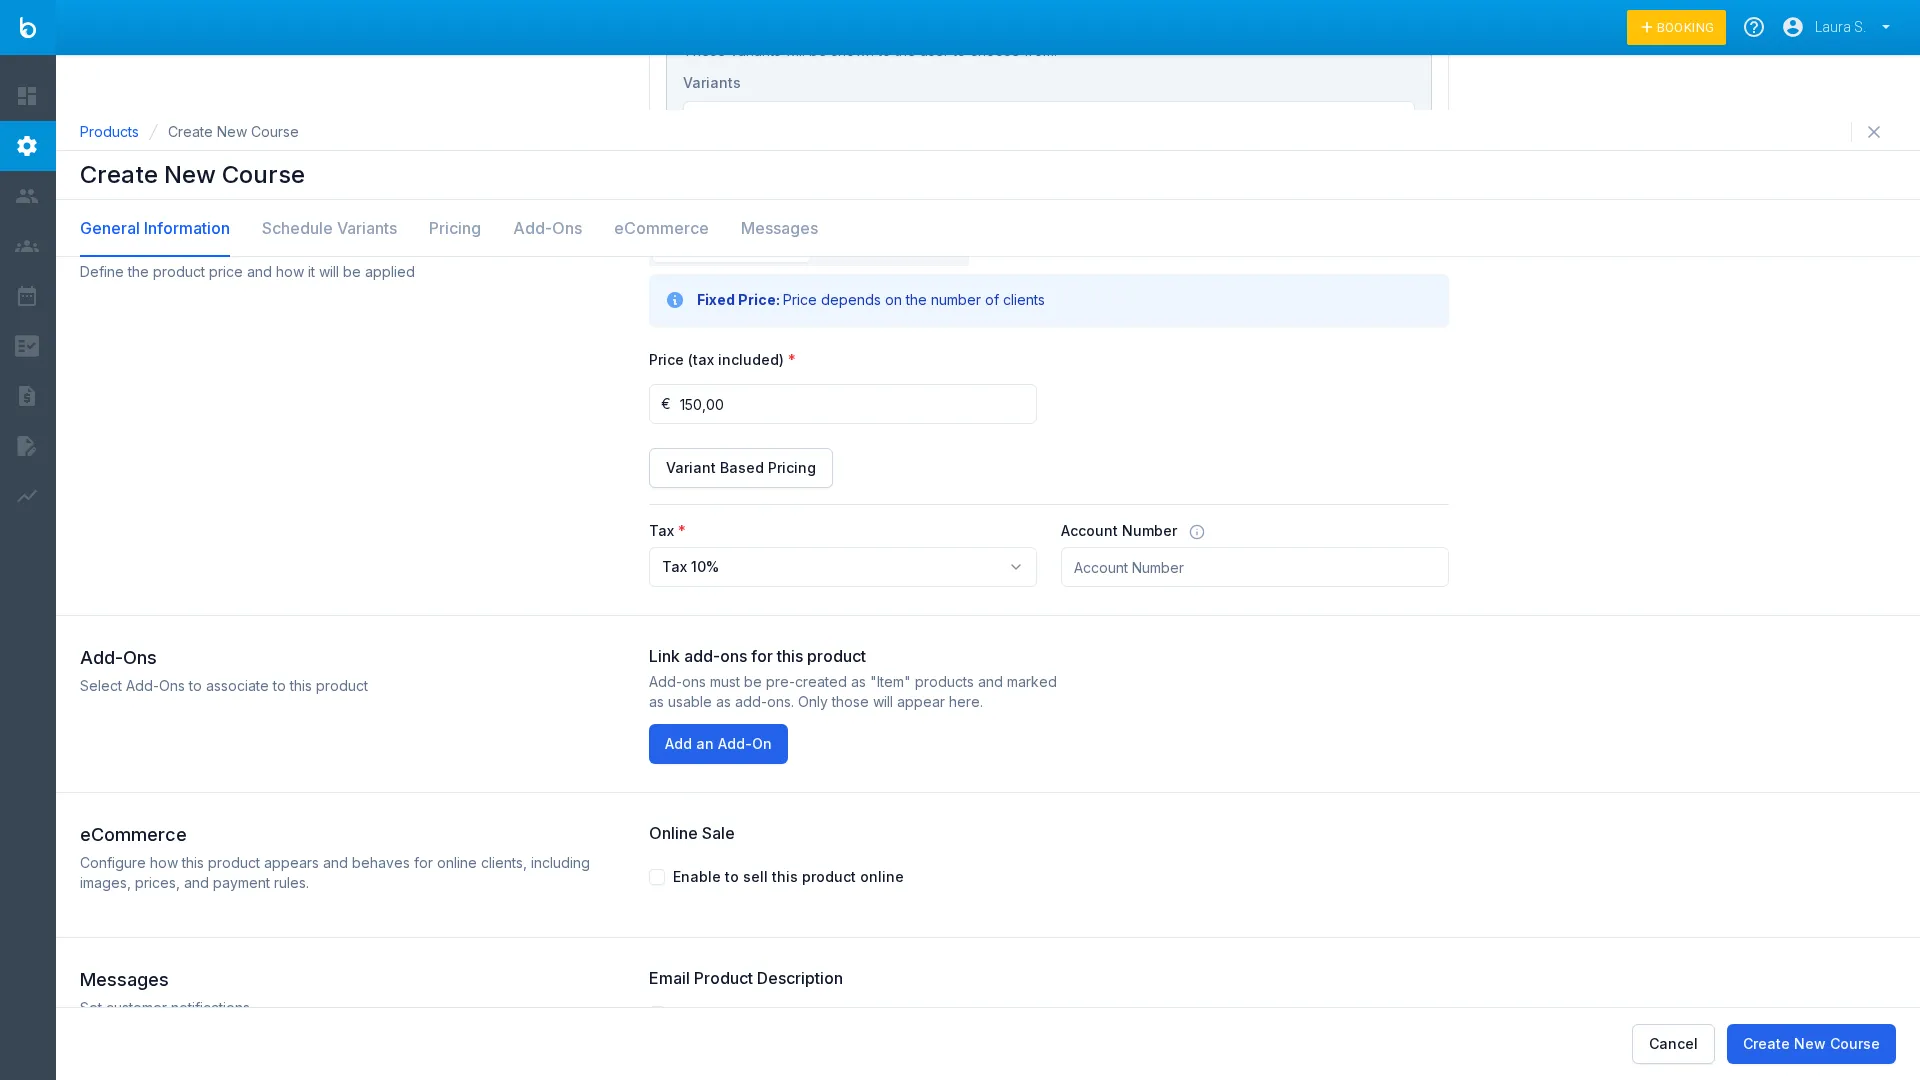
6. Set the price
Section titled “6. Set the price”Switch to the Pricing tab. For courses, the most natural pricing mode is Per-session discount, but you can use any mode:
| Pricing mode | Best for | How it works |
|---|---|---|
| Fixed price | Simple flat-rate courses | One price per person, regardless of session count |
| Per-session discount | Tiered pricing by duration | Set price per session — total is calculated automatically |
| Group discount | Volume-based pricing | Lower per-person price as group size increases |
| Static price | Fixed price per group | One flat price regardless of participant count |
| Field | Value | Notes |
|---|---|---|
| Price (tax included) | e.g. 150 | Total course price per person (for Fixed Price mode). |
| Tax rate * | Select from dropdown | Required. Select the applicable rate. |
| Seasonal pricing | Checkbox | Optional. Different prices by season. |
7. Save the product
Section titled “7. Save the product”Click Create course product. The product now appears in your products list.
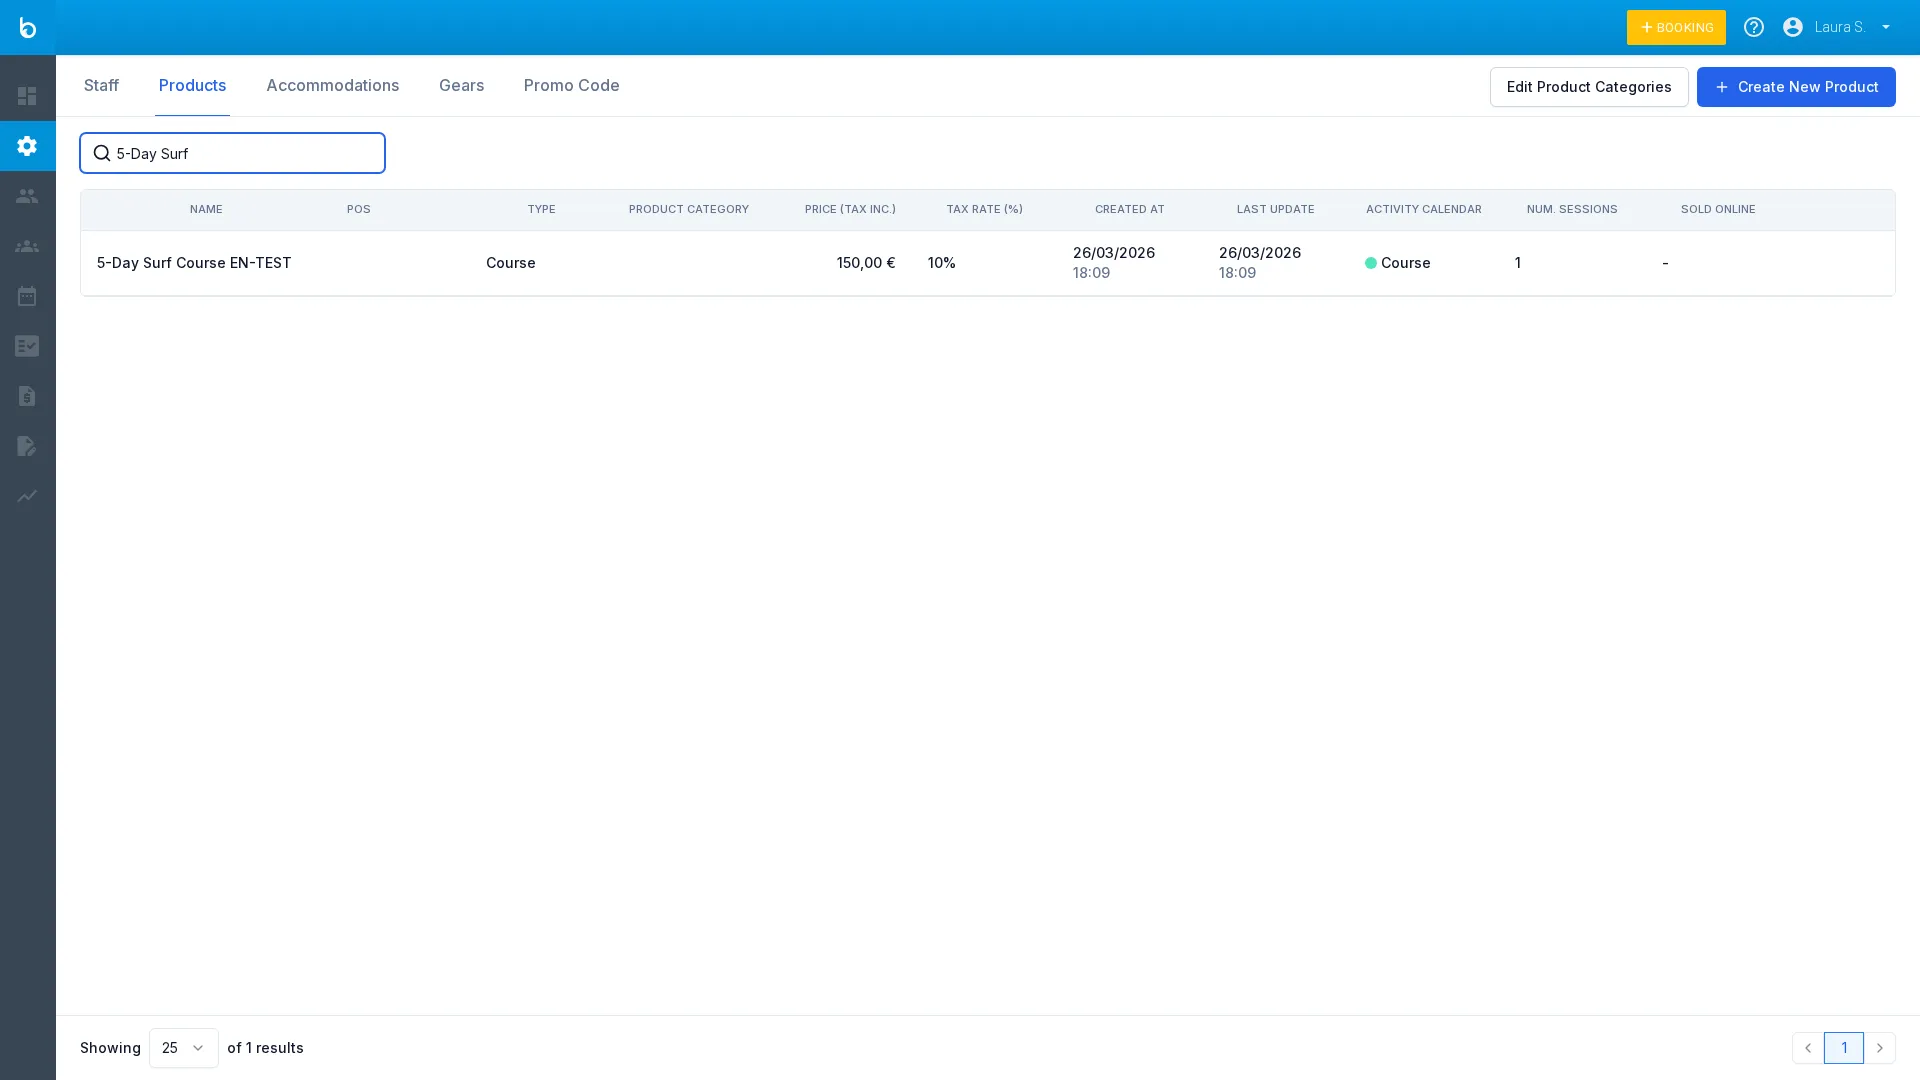
What should happen next
Section titled “What should happen next”- Your course appears in the Products list under Resources
- It’s available for bookings through the POS
- If eCommerce is enabled, it appears in your online booking widget
- When a customer books the course, they’re enrolled for all sessions in the series
Next step: Create the actual sessions on the agenda. If the course follows a weekly pattern, use Create Recurring Sessions to generate all sessions at once.
Common mistakes
Section titled “Common mistakes”| Mistake | Why it happens | Fix |
|---|---|---|
| ”Session count doesn’t match schedule” | Number of sessions in product doesn’t match sessions on agenda | Align the product’s session count with the actual number of recurring sessions you create |
| ”Customers see wrong total price” | Using per-session pricing but the session count is off | Verify the number of sessions and per-session rate calculate to the expected total |
| ”Can’t find my course in POS” | Product was archived or has no linked calendar | Check the products list and verify the activity calendar link |
If it still doesn’t work
Section titled “If it still doesn’t work”- Verify the Activity Calendar link (Resources > Products > your course > Scheduling tab)
- Check that sessions exist on the linked calendar (Planning > Activity Agenda)
- Contact Bloowatch Support via the chat widget with your course name and a description of the issue
