Set Up Online Booking on Your Website
Quick path: Settings → eCommerce → Copy embed code → Enable product → Set payment rules → Save
What this helps you do
Section titled “What this helps you do”The Bloowatch booking widget is an embeddable catalog you drop into your website. Visitors see your activities, available sessions, prices, and a checkout flow with online payment. Bookings land straight in your Sales dashboard — no manual entry needed.
This article walks you through the full setup: enabling online booking in Settings, configuring which products appear and how customers pay, and embedding the widget on your site.
Before you start
Section titled “Before you start”- You’re on a PRO or GOLD plan (online booking is not available on START)
- At least one product exists with pricing configured (see Create a Flexible Sessions Product)
- Sessions are on the Agenda so customers have something to book
- You have access to your website’s HTML (or your website builder allows custom HTML/embeds)
1. Go to Settings > eCommerce
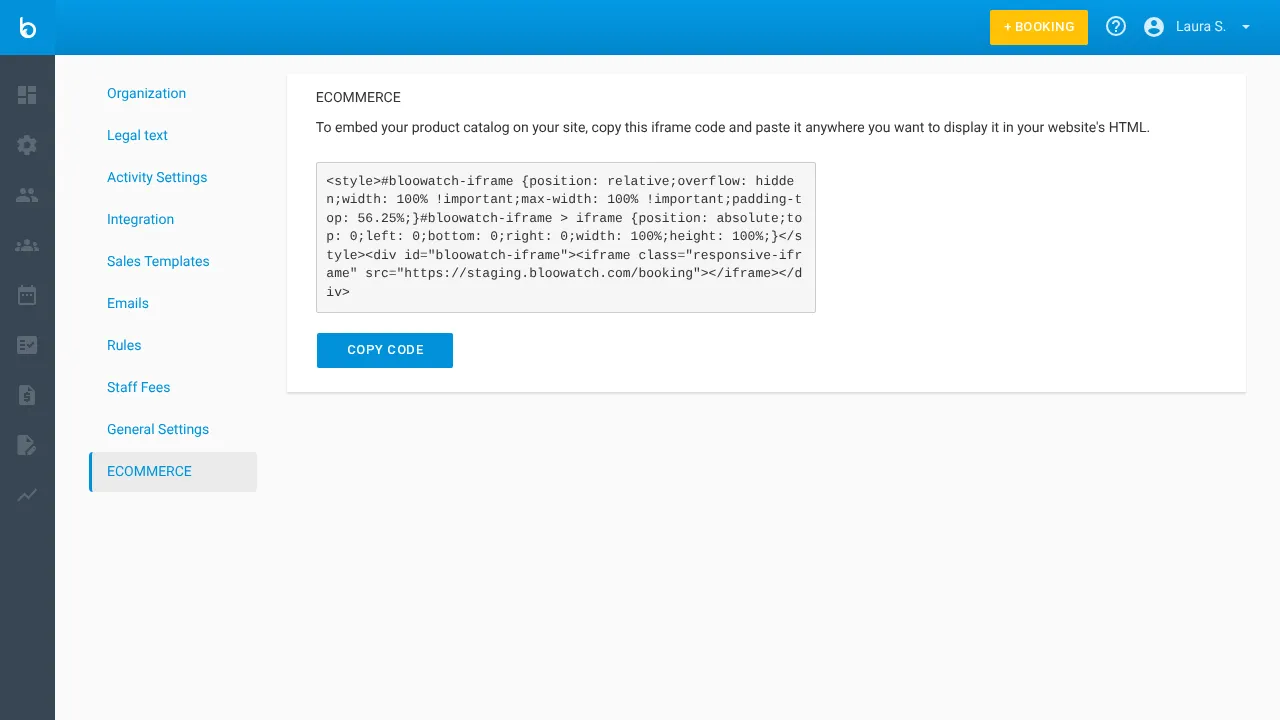
Section titled “1. Go to Settings > eCommerce”Click the gear icon in the left sidebar to open Settings, then click eCommerce in the settings menu. This page contains the embed code for your booking widget and a preview of your booking URL.
2. Copy the embed code
Section titled “2. Copy the embed code”The page shows an HTML snippet with <style> and <iframe> tags. The iframe source points to your booking URL (e.g., https://your-school.bloowatch.com/booking).
Click COPY THE CODE to copy it to your clipboard. You’ll paste this into your website later (step 7).
Here’s what the embed code looks like:
<style> .bloowatch-booking-wrapper { position: relative; overflow: hidden; width: 100%; padding-top: 56.25%; } .bloowatch-booking-wrapper iframe { position: absolute; top: 0; left: 0; width: 100%; height: 100%; border: 0; }</style><div class="bloowatch-booking-wrapper"> <iframe src="https://your-school.bloowatch.com/booking" allowfullscreen></iframe></div>Watch out: The responsive wrapper uses
padding-top: 56.25%(16:9 ratio). Depending on your site’s layout, you may want to adjust this value or set a fixedheightinstead.
3. Preview the widget
Section titled “3. Preview the widget”Open your booking URL directly in a browser to preview the widget. It shows:
- Your school name and logo
- Category tabs matching your product categories
- Product cards with image, name, description, starting price, and a BOOK button
- A CART for multi-product bookings

4. Enable online sales for a product
Section titled “4. Enable online sales for a product”Now configure which products appear in the widget. Go to Resources > Products, open a product, and click the eCommerce tab.
Check Enable to sell this product online. Only products with this checkbox turned on are visible in the booking widget.
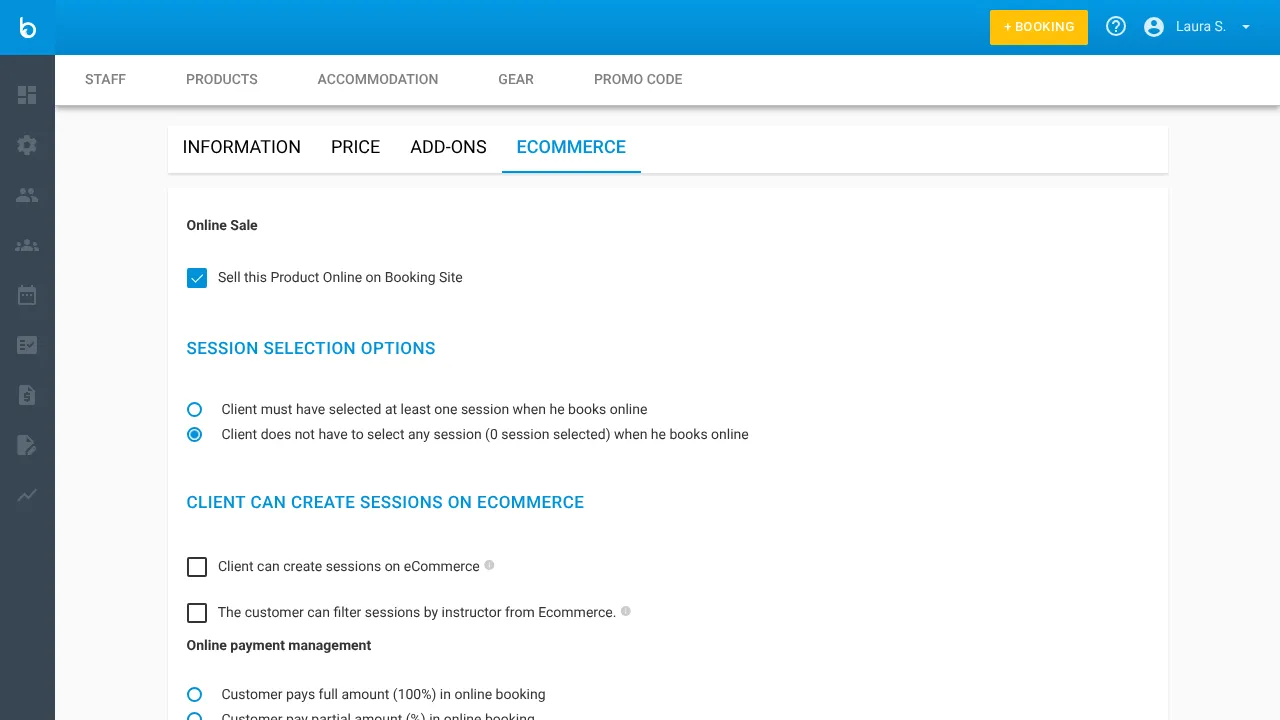
5. Set payment rules
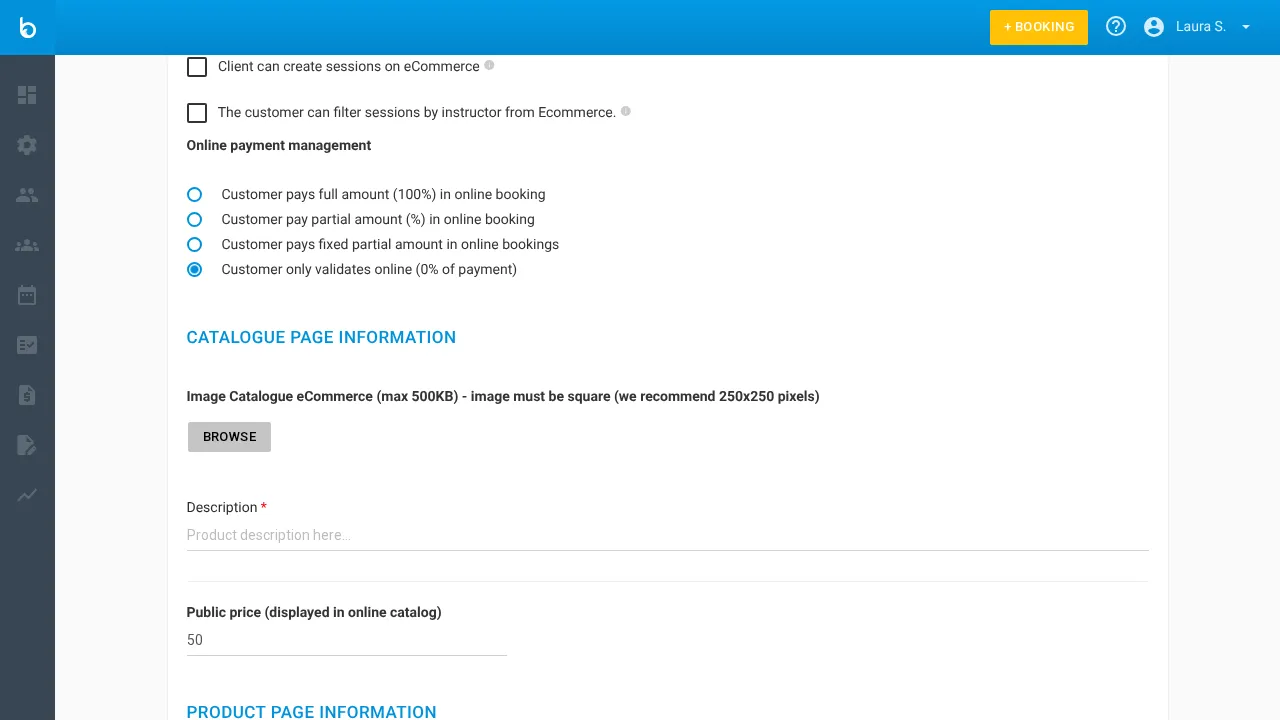
Section titled “5. Set payment rules”Under Payment rules for online bookings, choose how much customers pay at the time of booking:
| Option | When to use it |
|---|---|
| Customers pay the full amount (100%) | Most common. Guarantees full payment upfront. |
| Customers pay a percentage as deposit | Good for expensive activities — collect e.g. 50% now, the rest on the day. |
| Customers pay a fixed amount as deposit | Flat deposit (e.g. 20 EUR) regardless of total price. |
| Customers don’t pay upfront (0% payment) | Free booking confirmation — collect payment on-site. |
| Customer pre-authorizes the card | Card is verified but not charged. Available on some plans only. |
6. Customize the catalog info
Section titled “6. Customize the catalog info”Under Catalog page information, configure how the product looks in the widget’s product grid:
| Field | What it does |
|---|---|
| Upload catalog image | The product thumbnail in the catalog grid. Max 10 MB. |
| Description | Short text shown below the product name on the card. |
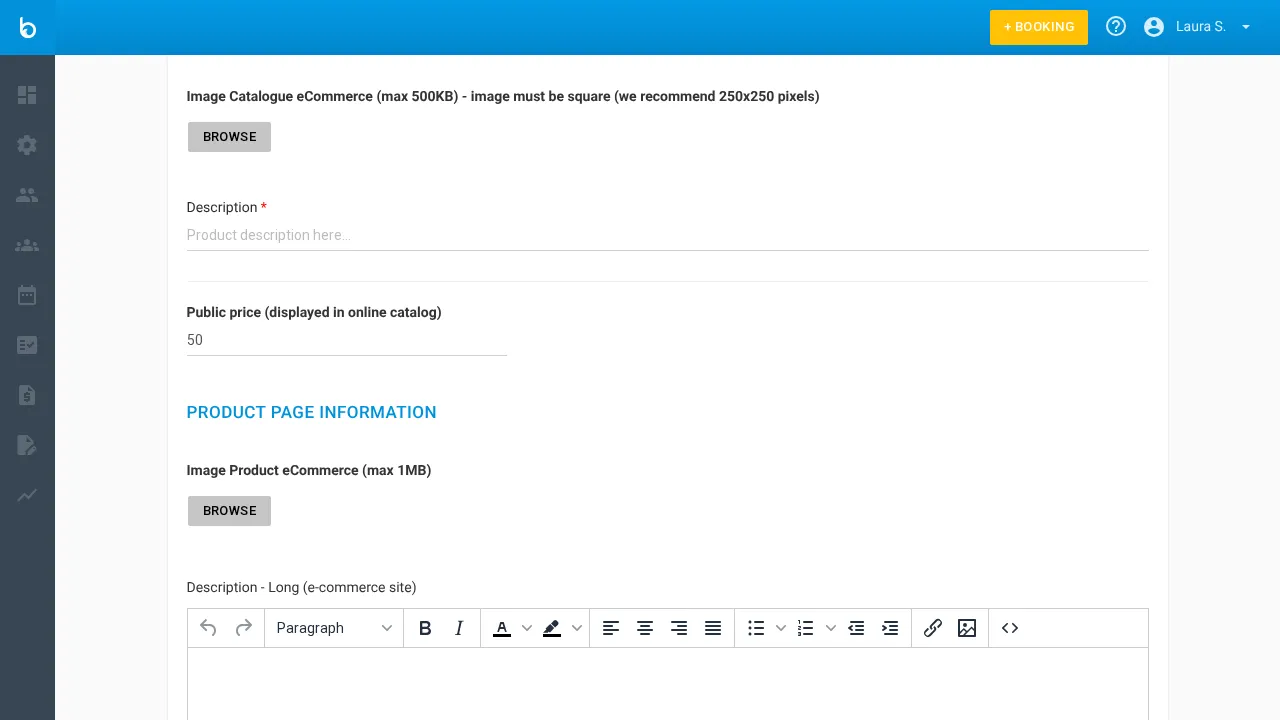
| Public price | The “From X EUR” price shown on the card. This is a display price — it can differ from your actual pricing. |
Under Product page information, add a larger image and a rich text description for the detail page customers see after clicking BOOK.
Click Update product to save.
Repeat steps 4-6 for every product you want to sell online.
7. Add the widget to your website
Section titled “7. Add the widget to your website”Paste the embed code you copied in step 2 into your website. How you do this depends on your platform:
- Raw HTML / custom site: Paste the code directly into a page’s HTML where you want the booking catalog to appear.
- WordPress: Add a “Custom HTML” block in the page editor and paste the code.
- Wix: Use the “Embed HTML” widget.
- Squarespace: Add a “Code” block.
Alternatively, you can simply link to your booking URL (https://your-school.bloowatch.com/booking) — the widget works great as a standalone page too.
What should happen next
Section titled “What should happen next”- The widget shows your enabled products with images, prices, and available sessions
- Customers can select a date, choose a group size, and complete checkout with online payment
- Each booking appears in Sales > Bookings with origin WEB (vs INT. for manual bookings)
- You receive a notification for each new online booking
Test it yourself: open your booking URL in an incognito window, walk through the full flow, and verify the booking appears in your Sales dashboard.
Common mistakes
Section titled “Common mistakes”| Mistake | Why it happens | Fix |
|---|---|---|
| Widget is blank / shows no products | No products have eCommerce enabled | Open each product’s eCommerce tab and check Enable to sell this product online |
| A product doesn’t appear in the widget | eCommerce is enabled but the product has no catalog image or public price | Add a catalog image and set the public price in the eCommerce tab |
| Payment not working at checkout | Payment gateway is not configured or plan doesn’t support online payments | Check Settings > Payments and verify your Stripe/payment integration is active |
| Sessions show “no availability” | No sessions exist on the Agenda for future dates | Add sessions to the Agenda (manually or with recurrence rules) |
| Embed looks broken on mobile | The responsive wrapper CSS doesn’t fit your layout | Adjust the padding-top value or switch to a fixed height (e.g. height: 800px) |
If it still doesn’t work
Section titled “If it still doesn’t work”- Confirm you’re on a PRO or GOLD plan — online booking is not available on START
- Open your booking URL directly in a browser to rule out website-side embed issues
- Clear your browser cache and try in an incognito window
- Contact Bloowatch Support via the chat widget
