Your First Setup Checklist
What you’ll set up
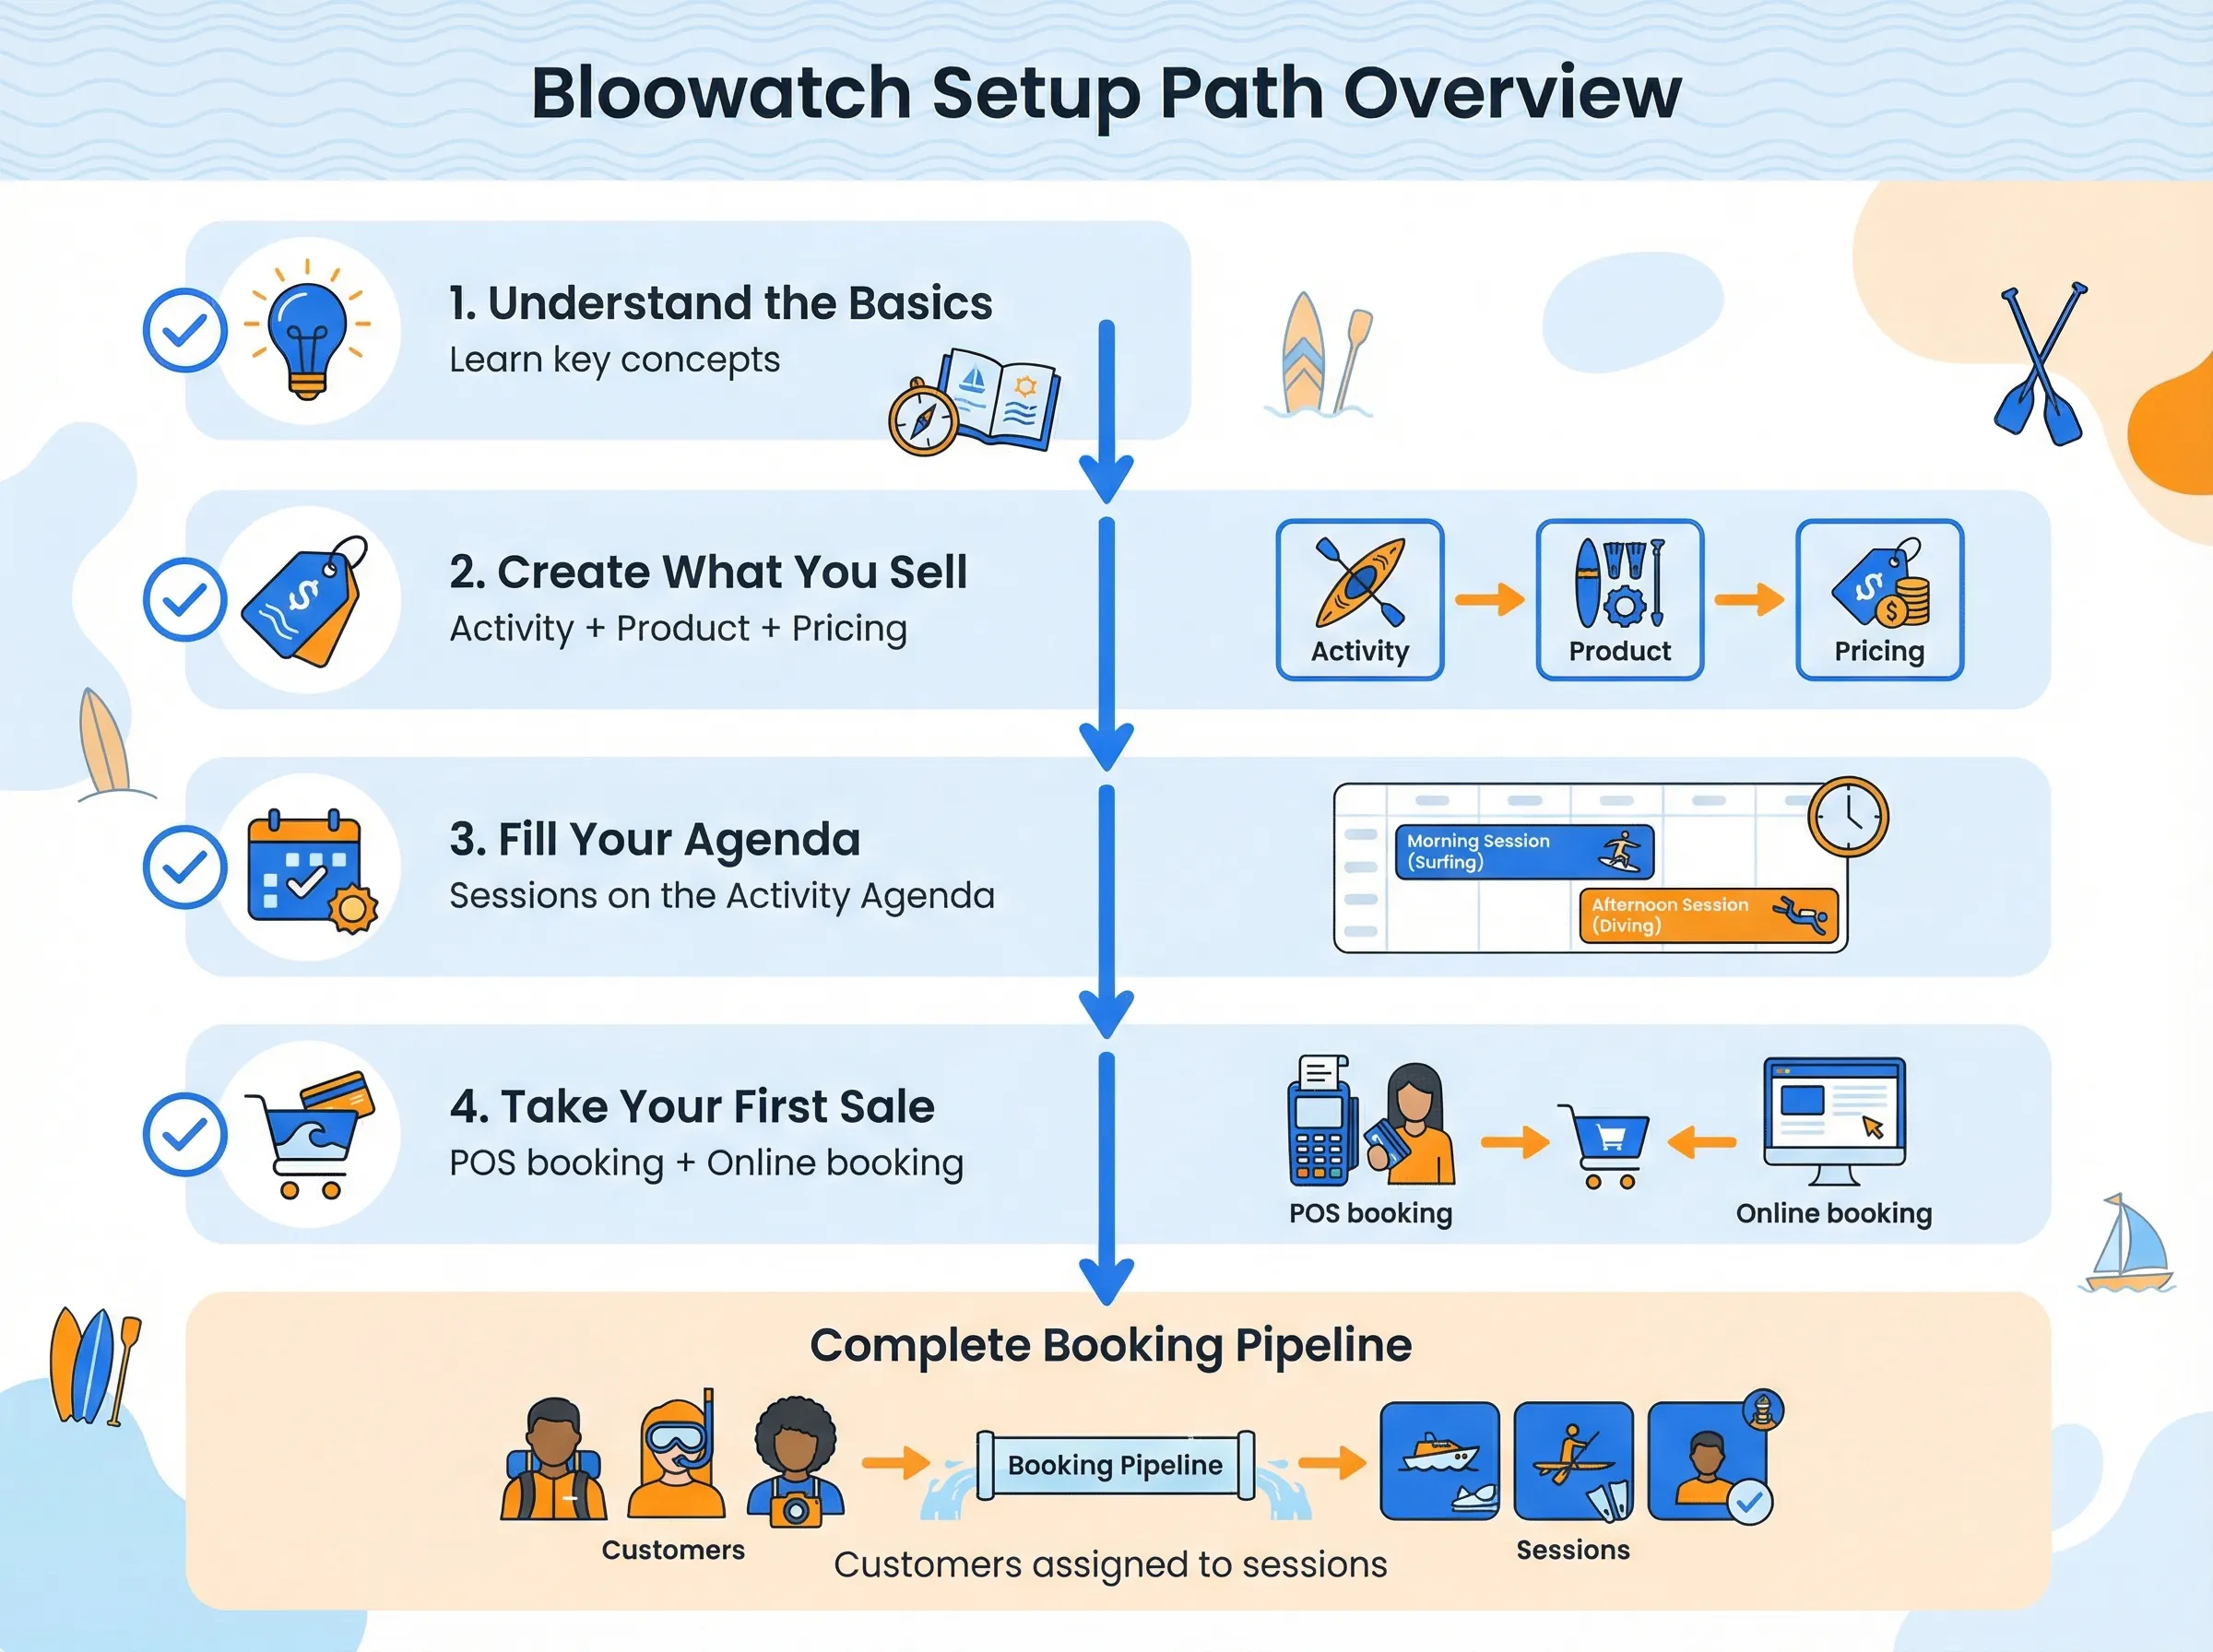
Section titled “What you’ll set up”By the end of this guide, you’ll have a fully working Bloowatch setup:
- An activity that defines your sport or experience
- A product with pricing that your customers can book
- Sessions on your agenda with assigned staff
- Your first booking — either from the back-office or through your website
Prerequisites
Section titled “Prerequisites”- A Bloowatch account (any plan: START, PRO, or GOLD)
- At least one staff member created (Settings > Staff)
- Your business currency and timezone set (Settings > General)
Phase 1: Understand the basics
Section titled “Phase 1: Understand the basics”Before touching any settings, make sure you understand how Bloowatch’s building blocks fit together. This takes 10 minutes and saves hours of confusion later.
- Key Concepts in Bloowatch — Learn the six core concepts: Activity, Product, Session, Booking, Client, and Participant
Phase 2: Create what you sell
Section titled “Phase 2: Create what you sell”This is where you define your offerings. You need at least one activity and one product before you can start scheduling.
-
Create an Activity — Go to Resources > Activities and set up your first sport or experience. Define the name, participant-per-instructor ratio, and assign qualified staff.
-
Create a Flexible Sessions Product — Build your first sellable product with pricing. Choose “Flexible Sessions” if you offer individual or recurring lessons.
Or: If your school runs multi-day programs, start with Create a Course Product instead.
-
Configure Product Pricing — Set standard prices, seasonal rates, group discounts, and deposit rules for your product.
Phase 3: Fill your agenda
Section titled “Phase 3: Fill your agenda”With a product ready, you can start creating time slots for your customers to book.
-
Create a Session — Add your first session to the Activity Agenda. Pick a date, time, duration, and assign an instructor.
-
Create Recurring Sessions — If you have a weekly schedule, set up recurring sessions instead of creating each one manually.
Phase 4: Take your first sale
Section titled “Phase 4: Take your first sale”Your agenda has sessions, your product has pricing — time to sell.
-
Take Your First Booking — Open the POS, select a session, add a customer, and confirm the booking. This is how you handle walk-ins and phone reservations.
-
Set Up Online Booking on Your Website — Activate your online booking widget so customers can book and pay directly from your website. (PRO and GOLD plans)
Verification checklist
Section titled “Verification checklist”After completing all steps, verify:
- You can see your activity listed under Resources > Activities
- Your product appears under Resources > Products with correct pricing
- Sessions show up on the Activity Agenda for the dates you created
- You have at least one booking visible under Sales > Bookings
- (Optional) Your online booking widget loads when you visit the URL
What you’ll have at the end
Section titled “What you’ll have at the end”You now have a complete booking pipeline:
Activity → Product (with pricing) → Sessions (on your agenda) → Bookings (customers assigned)
From here, you can:
- Add more products for different activities or experience levels
- Set up seasonal pricing to adjust rates automatically
- Create partner accounts for hotels and resellers who send you customers
- Explore reports to track revenue and occupancy
What’s next
Section titled “What’s next”- Request a Data Reset After Testing — If you’ve been experimenting with test data and want a clean start before going live
- Configure Product Pricing — Fine-tune seasonal pricing, group discounts, and deposit rules
- Set Up Online Booking — Let customers book directly from your website (PRO/GOLD)
